Let’s learn how to use Spark Camera to make movies on your iPhone
We’ll cover the basics in this guide and walk through creating your first video. We’ll record some video clips, add a filter, add a soundtrack and finally save your video to your camera roll.
Step 1 - Recording
When you open the app you will be presented with the Camera Screen. You can record a video clip by pressing and holding anywhere on the screen.
The camera will capture video as long as your finger stays pressed on the screen. You can see the recording progress represented by the colored line arc that grows around the central circle. Each recorded clip is represented by a new color.
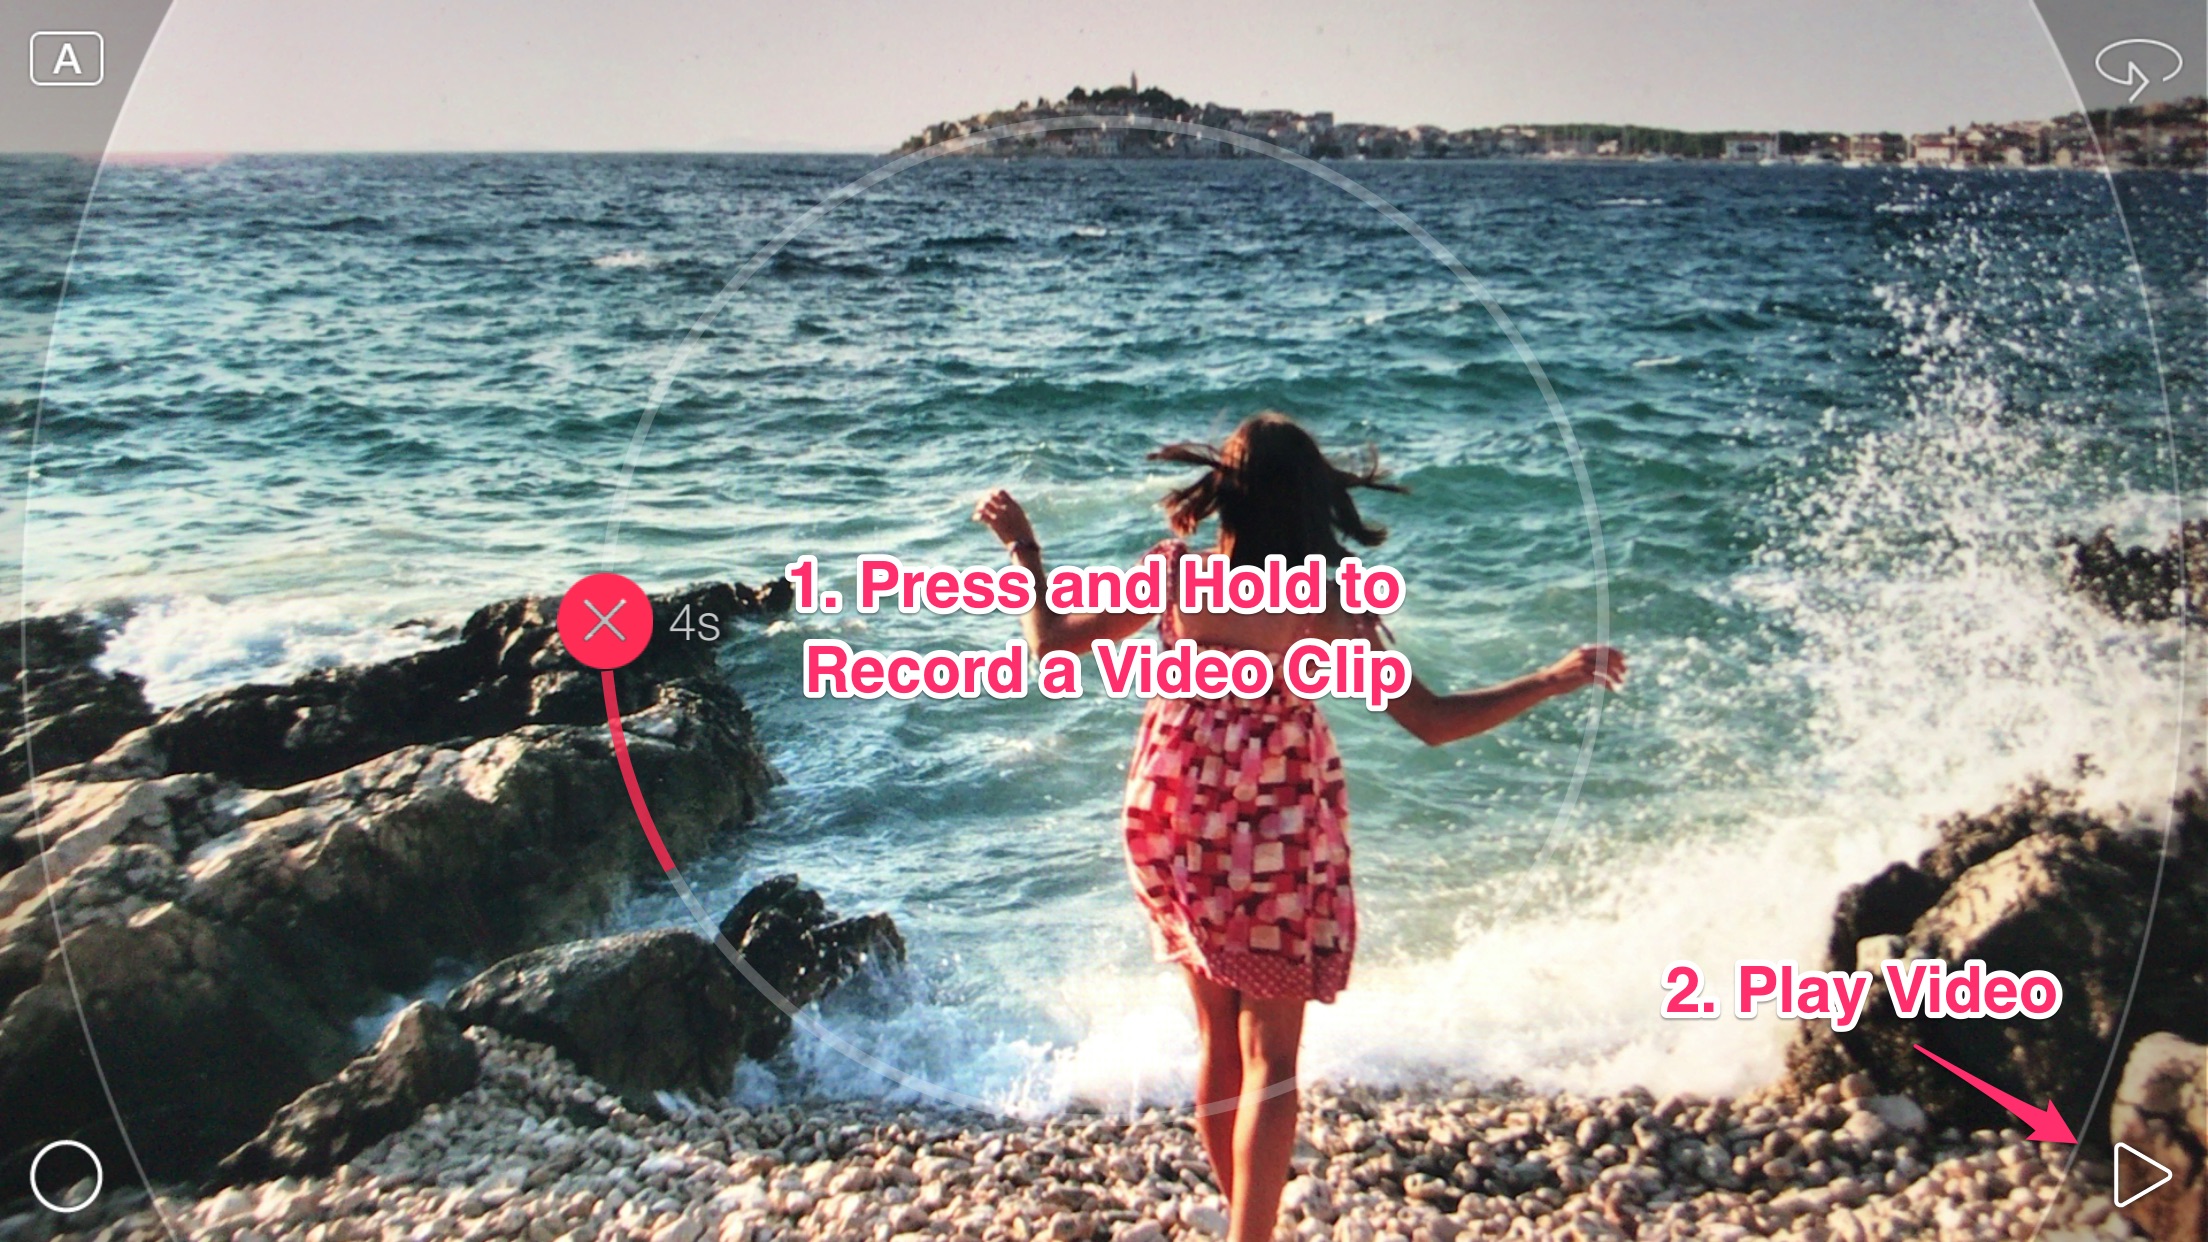
Try recording a few clips then press the play button to go to next step.
(Learn more about recording in this guide to capturing video in spark.)
Step 2 - Editing
Once you open the playback screen you will see the video clips you just recorded play in sequence.
Try swiping left and right to add a filter.
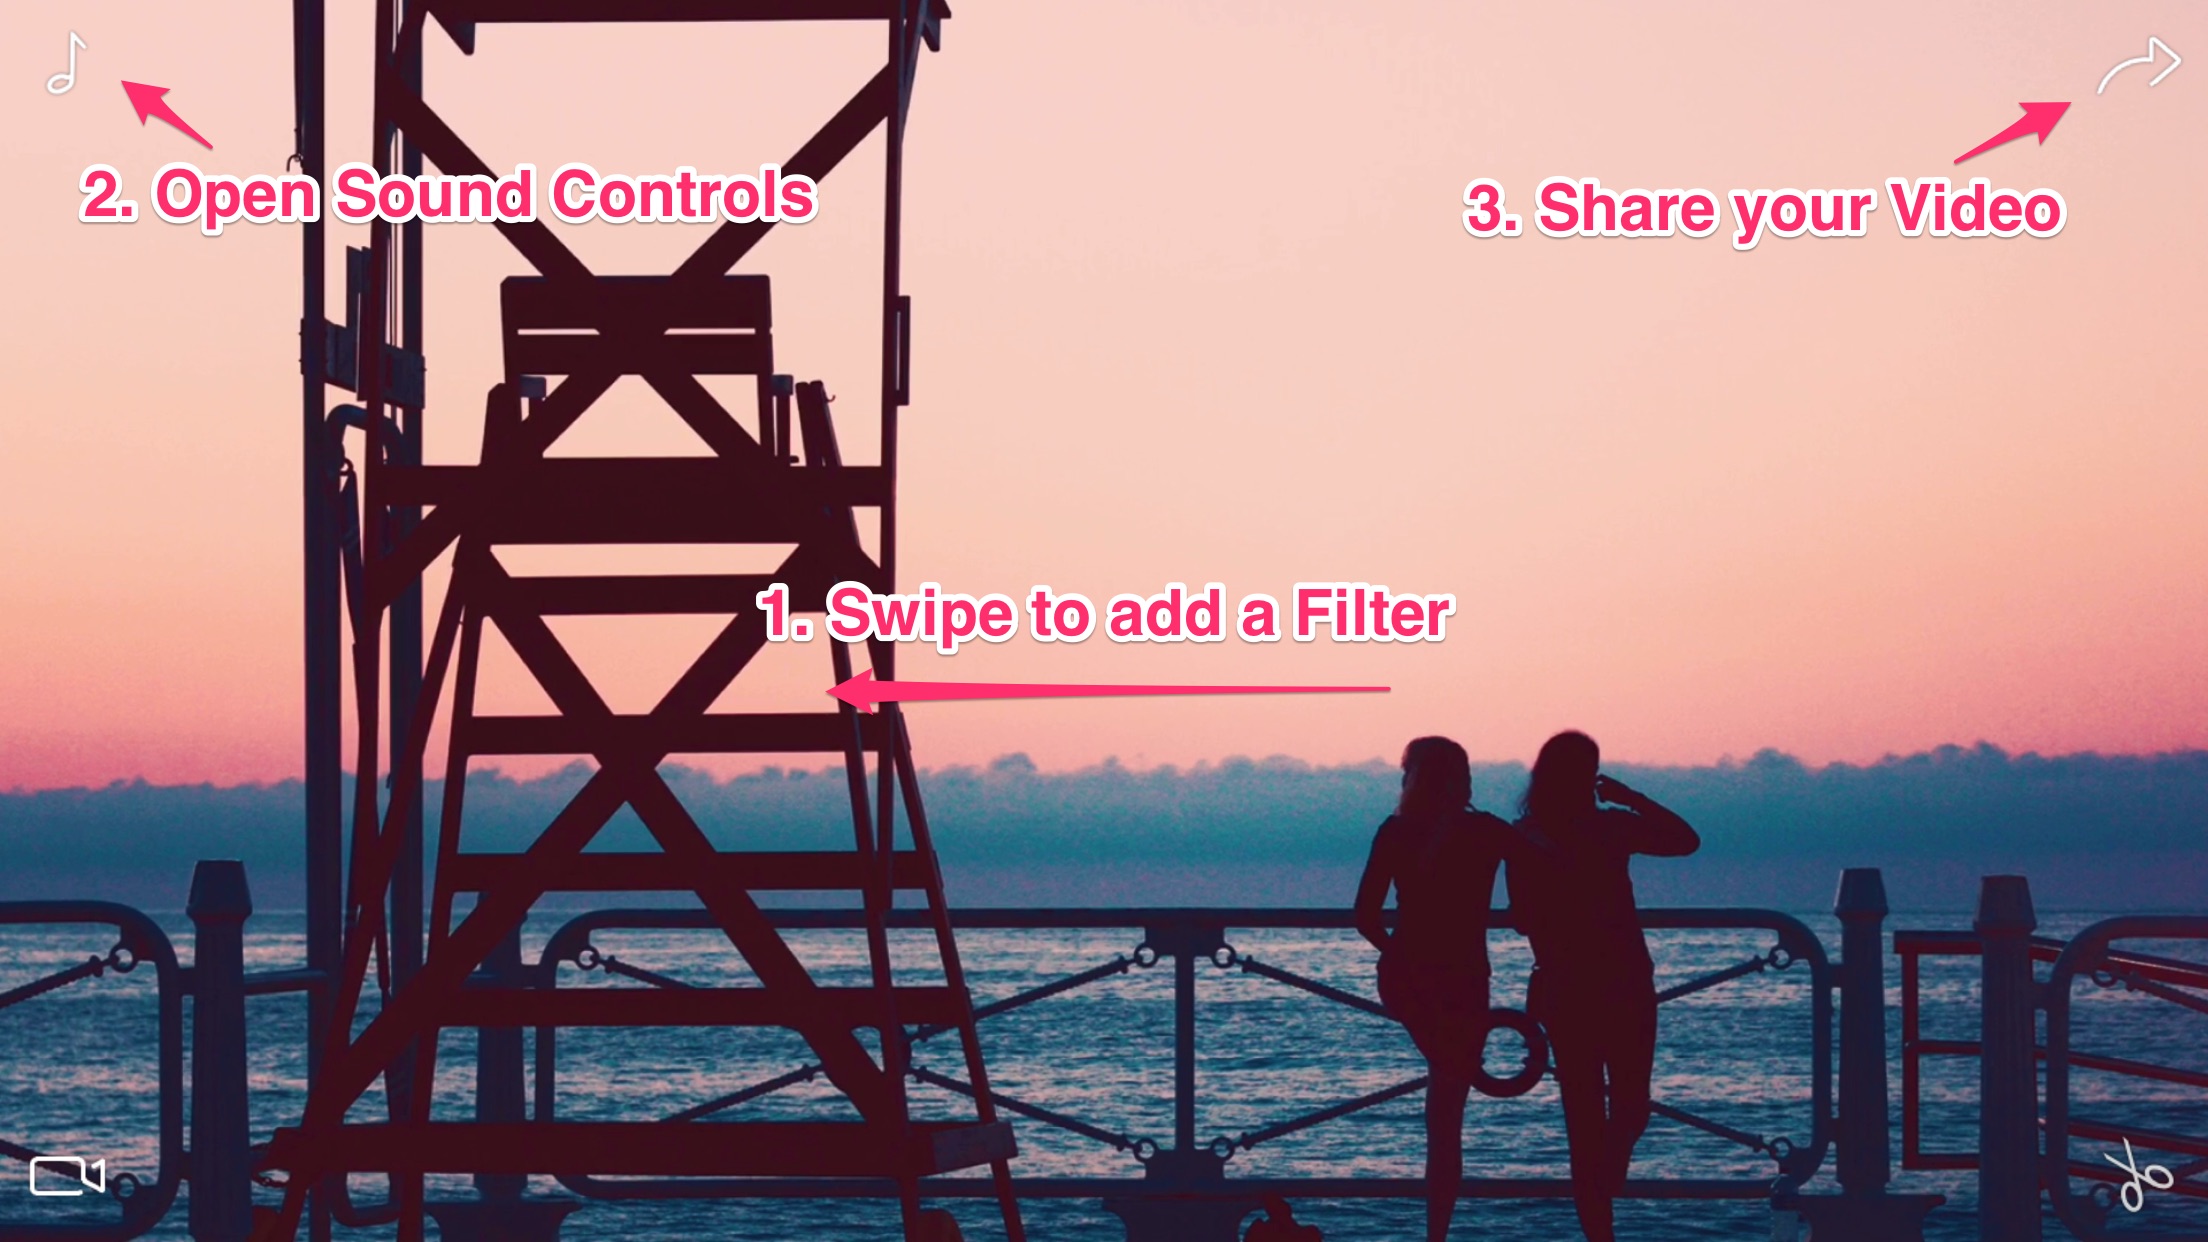
Now let’s add some music. Tap on the musical note in the top left corner to open the sound controls screen.
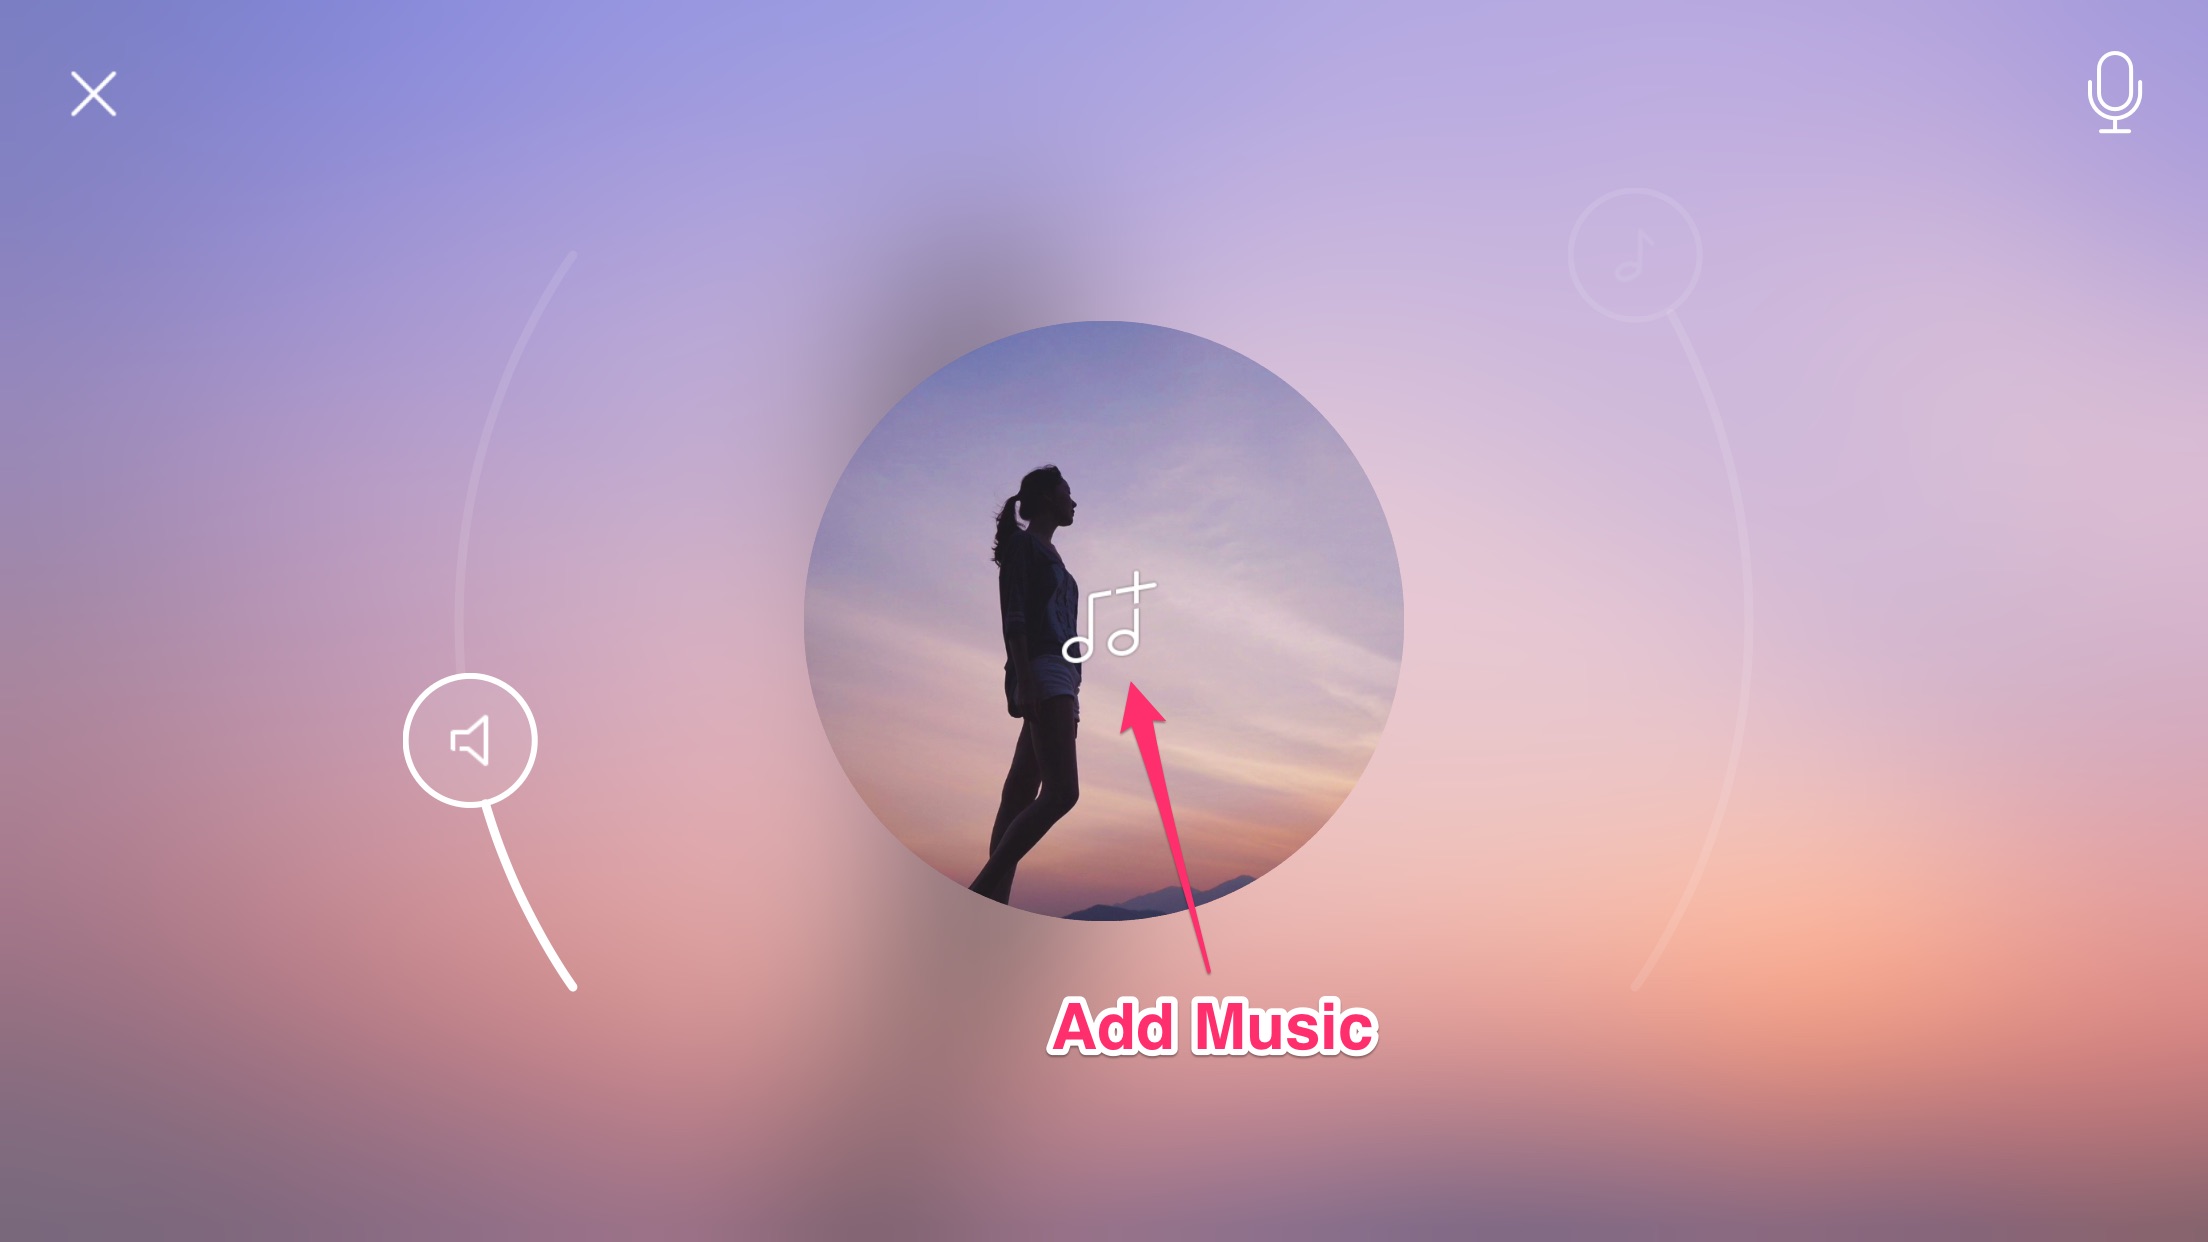
Tap on the musical note in the center to add some music from your iTunes library. When you are finished simply tap on the checkmark in the top left to go back to the playback screen.
(Learn more about editing in our How To Series.)
Step 3 - Save & Share
Now that you have a finished video you can share it by tapping on the arrow icon in the top right corner of the playback screen. You can select from several options here, for now let’s save to the Camera Roll.

You just created your first Spark!
Well done, we hope that you create lots of great memories with Spark Camera.
There’s many more features packed into Spark. You can get a taste of what’s possible by looking at our Visual Guide to Spark. Or deep dive into things with our How To Guides.